This is default featured slide 1 title

Go to Blogger edit html and find these sentences.Now replace these sentences with your own descriptions.

This is default featured slide 2 title

Go to Blogger edit html and find these sentences.Now replace these sentences with your own descriptions.

This is default featured slide 3 title

Go to Blogger edit html and find these sentences.Now replace these sentences with your own descriptions.

This is default featured slide 4 title

Go to Blogger edit html and find these sentences.Now replace these sentences with your own descriptions.

This is default featured slide 5 title

Go to Blogger edit html and find these sentences.Now replace these sentences with your own descriptions.

Thứ Tư, 22 tháng 6, 2016

How to Access Facebook from Gmail


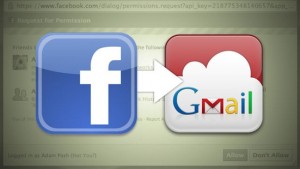
Facebook is often blocked when you use, you can do more easily and efficiently by linking directly to your gmail facebook. How can access facebook from gmail
Initially, you log in to your Gmail account If you do not already have an account, you will need to register and then login.

Once logged in you perform the following steps:

Click the settings gear icon at the right of the page.
Click install
click on the lab
Press allowed for "Add any gadget by URL."
Click save.
Now, users will want to return to the settings page and click on the Gadgets tab. In this tab, you will find the following: ". Add a gadget by its URL"

In this framework, you'll want to paste the following URL into the field: http://hosting.gmodules.com/ig/gadgets/file/104971404861070329537/facebook.xml

Then you click "Add". Now you will find the Facebook widget in the lower left corner of your Gmail account pages.

Note: since Google has devalued "Add any gadget by URL" function due to malware issues related.
Simple, easy and effective. This method is a great way to use Facebook right from within Gmail without having to step out of the frame Gmail tab. If you are a person that spends most of the day you send email, this will save a lot of time converting tabs to meet with a client.
Since the above method is outdated, we found no feasible method of using Facebook only with Gmail. However, there are a few useful browser add-ons and plugins that will allow you to use Facebook without actually be on the site.

Optional Chrome

Chrome has many extensions that you can download for Gmail. However, the extension absolute best Facebook called "Facebook for Chrome." Simply install the extension and you are almost ready to start browsing and use Facebook at your leisure.

Upper right, you will see a Facebook icon that you can click. This icon opens your news feed, allowing you to send messages and updates on all without ever returning to the main Facebook page again.

Firefox and Waterfox Options

The best add-on for Firefox is Facebook Messenger. This is not an official app, but it works very well and bring a lot of Facebook functionality for your browser soon. You only need to download and activate add-on to start.

When you restart your browser, you'll see a Facebook icon on the right side of the screen.

Click on this icon will allow you to send messages, post updates, and do a whole lot more. It's quick and easy to install, and you'll find that using it could not be easier.

When open, the add-on will display your Facebook options left in a window frame.
=>>Yahoo Mail Login

Thứ Năm, 16 tháng 6, 2016

Yahoo Mail Login


Worldwide, millions of people using the service receive their personal email at work and everyday life. Like Gmail, hotmail ..... Yahoo is one of the reliable email service and its especially important free. With yahoo allows you to easily use and create and change passwords safely reduce the risk of attack.
You need to log into your account to sign in Yahoo! Mail

To ensure safety for the account you need to change your password after 3-6 months. This makes your passwords are always new and reduced risk someone could infiltrate your account.
How to change your password easily
Step 1: You click on the gear icon
Step 2: Enter your account information
Step 3: Click on Account Information
You will be prompted to enter your password again to ensure the safety of your account, then you click Log

The next step you can do is:
Navigate to the log and security.
Click Change your password.
Finally, you can enter your password and change it.
Yahoo has a password strength indicator which is very accurate and secure. You want this bar to say that you have a strong password. This can be done by entering a password meets the following criteria:


Contains one or more capital letters.
Contain one or more numbers.
8-32 characters in length.
While not a necessity, it is highly recommended that you use symbols in your password. For example, P @ # $ ssw0rd is far safer passw0rd. Icon add a layer of difficulty to add your password, make your account more secure as a result.
Note: Your password will be used for all product accounts Yahoo.

Yahoo also urge you to never use the same password across a variety of different online accounts. This means that you will not want to use your password from a Yahoo account on your Facebook account. This would allow an attacker to easily access your account if your password is compromised. Using the same password for all accounts can leave your bank account and financial logged in danger.

If you're having problems with secure password or remember them, you can use a password manager to make it easier to keep all your passwords safely. LastPass has a free option will allow you to create and save all your passwords securely on their website. You can also install add-ons to the browser you can log in to your account automatically.

Tough, long password will increase security log your Yahoo Mail.
As for the password, it will be safer. Remember not to use any personal information in your passwords. For example, your home phone number or your name should not be included. Typically, hackers will use phishing techniques to obtain this information and then use your information to your account infringement.
If you want to use other email services such as Hotmail, gmail ... to experience all of its useful features visit http://gmailsigninvl.com to create an account and log in to Gmail
Good luck
=>>Gmail’s Latest APK Update – Latest features and how to download it

Thứ Năm, 19 tháng 5, 2016

Gmail’s Latest APK Update – Latest features and how to download it


Why do you need the latest update?

At the time of this writing, the latest APK update for the Gmail app is 6.3.117716127. The whole purpose of this update is to get it before Google actually include it with the application updated regularly. So why do you need to have the latest updates? Because it can have the features you want, but that Google has not been released officially yet, and the only way you can get them together with your Gmail application is to download the updates APK hands and install it.


Includes features of the latest app update

How to get Gmail APK update

The hardest part of installing and updating APK is to actually find it. The whole purpose of the installation of this update is that you can get the features included in the update but before the time when Google actually release them in your area on Google Play App Store Store but that means you can not find them on the play Store. There are places that you can not find the information updated APK but you are definitely going to have to search for files by hand. Search for the latest updates can be the most difficult part of the whole process.

How to install it

Once you've found the updates then you need to save it to your computer and transfer it to your phone somehow, save it to a location where you will be able to remember it . If this is the first time you install the APK update then you need to go to your settings menu and go to the Security tab and allow unknown sources. That way you will be able to install the files because otherwise restrict Google's updated Google Play store. From there, all you do is use a file manager to navigate to where you stored the APK file and then install it. Google will ask you for some rights and then allow you to install it.
If you've ever wondered how to install the latest updates for Gmail APK - or even whether or not you should be, and the benefits it provides - this article will guide you through the process and explain what you need to know about latest updates APK from Gmail.
Gmail Settings app

There are some pretty cool features of the app comes with the latest updates for April 2016 already. You still might want to update your APK if you see a feature that you need from a web page monitoring agency Android you've registered, but still features quite outstanding. One of them is the fact that Google has significant upgrades to their calendar functionality within the email interface.

In the past, you would have to go through and collect emails related to an event to see if anything has changed, and then change it on your calendar, but with the new update, Google gathers all the emails for you and you can see immediately whether or not a calendar item that has changed.

The new update also improves the newsletters you receive in your email box. When you receive the newsletter now, you can look at it without having to open it. You can also move around and go to the news you want to read immediately by clicking on the section from the preview.

There may be other minor bug fixes and updates that are included in this update, but these are big changes. There are more apparent in the latest update APK.


Gmail account 
What is an Update Gmail APK and why is it important?
APK update is simply an update of technical application - one that has not been issued. All applications are out there capable of updates, with the latest code includes new features, upgrade security and even change the interface. Most people do not update their applications by hand and on most of the apps you have installed on your phone or mobile device, this is not really a big problem. However, when it comes with a feature that has not officially been released in the Google Play store - you have to manually install an application package.
=>>How to Enable To Unsend Feature for Gmail

Thứ Ba, 17 tháng 5, 2016

How to Enable To Unsend Feature for Gmail

Enabling Gmail "unsend" feature is simple and easy. Just follow the steps listed below, and give the feature a test drive. Because you never know when you might need this feature, we suggest that you drop everything right now and allow it (just in case). Now, you never have to worry about sending out a poorly written email or angry anymore.


Enable Gmail unsend

Ready to enable "undo send" feature? The process is simple and easy. Here's how it works:


Log into your Gmail account.
Click the gear in the top right of the page.
Click Settings.
Find "Undo Send" feature, and select Enable.
Now, select the cancellation period and click Save Changes.
The cancellation period is the amount of time Gmail gives you to decide if you want to "undo" send your message. Google provides you with four options: 5, 10, 20, or 30 seconds. For maximum protection against accidental email, we recommend setting the cancellation period to 30 seconds.
unsent email gmail

Lots of e-mail program will give you the option to retract your email, but unfortunately, the wind up in a recipient's mailbox. Gmail works a little differently.

If you have an "undo send" is enabled, Gmail will actually wait a few seconds before sending an email. This allows you just enough time to change your mind and do not send your message. You will still need to be fast, though. Gmail shows you a certain amount of time to prevent the message from being sent.

The Undo Send feature was trapped in Google Labs for a whopping six years, but now it is a standard feature available for all Gmail users.

How to use "unsend" feature

Now you have enabled the "undo send", it is time to check it out.


Make sure you're logged into your Gmail account.
Click Compose to create a blank email. Put the recipient as yourself, and create a fake email.
Click
Now, pay attention to the top of the screen. An information bar will appear (like the one you see when you send a regular message). Along with the usual message "Your message has been sent", you'll find a link "Undo".

Prevent your test message sent by clicking the "Undo" link. Gmail will stop sending messages and will even show you an email. This way, you can change it if you want, and resend the message. If not, it will be saved to the draft, and you can choose to either keep it or delete it.

Now, remember that you only have seconds (up to 30) to undo your mistakes, so act quickly. And if you leave the site or experience problems connecting, you will lose your chance to undo your sent messages. Even clicking on the link to "View Message" will be counted as navigating away from the page.

Unfortunately, the Undo Send feature is available only on the desktop version / Gmail web. You will not be able unsend any email that you compose applications through iOS or Android mobile phone. Ironically, it is prone to making mistakes when writing emails on mobile devices.
=>>How to Add Gmail to Windows 10 Email

Thứ Sáu, 13 tháng 5, 2016

How to Add Gmail to Windows 10 Email

Windows 10 Outlook Gmail

Once you've finished, each application will work when needed. In Mail, you can use the Archive you will look like in Gmail and other links in the window facing give you the option to define your Gmail folders you want to appear there. Once set up, you can use the Mail app to view and reply to messages in the same way Gmail as you do in the Gmail interface.
Gmail Windows 10

It is good to know that regardless of whether you use the People, Mail or Calendar application to configure your Gmail account, it will automatically become available in all three of these applications later. So no need to go through all three applications - once you have configured your Gmail account in one of them, the other two will be good to go.

Chances are, you will not want to use the account with the default settings. So you will need to configure the account to personalize it for your personal needs. Again, you can do this from any of the three applications and interfaces for the same, any changes you make will update all three of these applications.

To do this, select the Google account in the Accounts pane using Mail or Calendar, or if you are using the people, the Settings window. This gives you the option to rename it whatever you want. Then, click 'Change settings sync mailbox. This option allows you to choose how often they are updated Gmail - 'based on my usage' is the default, but most users prefer to use "as items arrive" option for email accounts push-based. you can usually choose how often contacts and calendar are synchronized, how many actually email your Gmail account to download, and you can choose to email or even sync account in the first place. You can also use this option to disable sync your Google account to Mail, Calendar and People.

Windows 10 Add Account


To set up your Google account, start by first launching or Mail, Calendar or Windows 10 people on your device. If you're running the app for the first time, you can set up your Google account in the first run experience by simply following the instructions on the screen. If not, configure the account by selecting Settings option, located in the lower left corner, or Mail or Calendar. If you are using the People app, select "..." option and then select Settings, located in the upper left corner. Once you have done this, select Accounts> Add an account, or simply select 'Account' if you are using people. Then you will see a window titled "Select an account" appears.

In this window, select Google, and go through the wizard to connect to a service provider of your Gmail email address, username and password are two steps to verify your account if configured. Once you have provided all the information requested, the service accepts the connection and press Done when the wizard completes.
=>>How to use CardDav to Sync Gmail Google Contacts with iOS

Thứ Năm, 12 tháng 5, 2016

How to use CardDav to Sync Gmail Google Contacts with iOS

This method not only sync contacts in Google or Gmail limits alone, so no need to worry if you are a user of a platform such as Outlook or Yahoo! Mail email. To use CardDAV to synchronize contacts from any other email account with iCloud with iPhone, iPad or iPod Touch, simply enter the information from the email accounts required by using the steps detailed below

First and foremost, you'll need to open the Settings app on your Apple device. Then, select Mail, Contacts, Calendars option. The next step is to open the Accounts> Add Account> Other. In the 'Contact Us', you will see an option to' Add CardDAV Account. Click here.

Once you have done this, you will be directed to a setup wizard that asks you to enter your information. Since you are adding a Google account to sync your contacts, you enter your Google account information to your request. While doing this, you should be sure to set the option 'Server' to 'google.com', along with a Google account name, password and verify your code if you have one set up.

The format should look like this:

Server: google.com
Username: [username Gmail / Google your]
Password: [password Gmail / Google your]
Description: [however you want to describe the account, for example: 'Personal' or 'work'.]
Add CardDAV


Once you have finished entering all the information in your Google account or your Gmail, click the option 'Next', appears in the upper right corner. This will complete the installation of your CardDAV.

Once you have completed follow the instructions, your CardDAV account will be set up immediately (depending on the speed of your internet connection - if you have a slow connection, it may take a few minutes ). After installation is complete, contacts and Gmail's Google account you will start immediately synced with your iPad, iPhone or iPod Touch.

Although an option iCloud email account that provides a lot of simplicity and ease of use, it is not always possible or preferable for users to convert emails from the account of a third party to iCloud for the sole purpose of syncing contacts with their Apple devices. CardDAV routes are highly recommended for those who already have a Gmail account or Gmail at hand, and the need to ensure that their contacts stored on their Apple device with the device other. This method is highly recommended for those who switch to Android devices from Apple as it takes away a lot of the hassle involved.
For iPhone, iPad and iPod Touch users to use an email application Gmail more third parties such as Apple's very own iCloud, synchronize email contacts with your Apple device can be a process rather complex. However, you will be pleased to know that even though synchronization applications with IOS third party is well-known as tough, synchronize contacts Google / your Gmail is not really difficult as one might expect team.
=>>How To Make Phone Calls Online Using Your Gmail Account

Thứ Hai, 9 tháng 5, 2016

How To Make Phone Calls Online Using Your Gmail Account


Gmail is a popular service used by many people worldwide to send and receive mail. Gmail has a feature that allows users to make phone calls online with friends and family. It is a new Gmail feature hangout August 2010. The following will guide you how to make a call
Follow the steps below:
Step 1: First you need a gmail account gmail account Investments Create and after creating the record in your account.

Step 2: Then you go to Google Voice

Step 3: You download Google Voice Call Settings plugin and then download the plugin in your computer to open it.

Step 4: At the top left of the page, click Call.

Step 5: In the box under "The Call", type the name or phone number of the contact.

Step 6: In the box under "Phone call," click the drop-down to select the type of phone you want to use for the call.How To Make Phone Calls Online Using your Gmail account


Thứ Tư, 4 tháng 5, 2016

5 Ways To Log Into Several Gmail Accounts At The Same Time

Do you have multiple Gmail accounts, and you can not open them all at once. You logout login each time you switch. Here are five different methods allow you to login multiple Gmail at the same time.
1. Manage Gmail

Finally, the be all and end all: a Firefox plugin that solves all our problems. Sounds great in theory, but in practice it is a little more complicated. Some users are reporting problems with Firefox 3 (it worked for me), and more recently it has stopped working with a Google Apps account. However, if it were not for the disadvantages, this plugin will be the perfect solution; you just add all your information once, and then switch between your accounts when needed, or simply have them all open tabs. Warning notifications via images as well as audio alarms are also available upon arrival. In short, the problem is being fixed this plugin will certinaly is the best solution available,
2.  Google Account Multi-Login


A workaround that does not exactly solve the problem, but it makes it less troublesome. This Greasemonkey scripts to provide you with a drop down from which you can select an account number. You can not see all at once, but you can switch from one to another in a second.

Know other methods to have multiple Gmail accounts open at once? Let us know in the comments.

3. Multiple browser


The most obvious method is to simply use a web browser at the same time, and log into a Gmail account is different for each person. If IE and Firefox are not enough, add to the mix Opera and Safari. The disadvantage of this method is quite clear: next to the drain extra memory, you basically back in the dark ages of tabless browser, to switch between three or more different windows cluttering your taskbar.

4. Master


This is a workaround solution that requires you to create a "master" the Gmail account that you forward all your other Gmail account, thereby eliminating the need to have all of them opened at the same time. Open your regular account (s), click Settings - Forwarding and POP in Gmail, enter the address of your master account, select Gmail to keep a copy of the message in the inbox, and press Save Changes. In addition, you can spice up this method by using the filter to forward specific messages, and labels marked messages from different accounts. The problem with this method can be size: if you get a lot of e-mail, you can end your full Gmail quota (yes, it can happen). Moreover, some users (me) simply want some accounts; account when you have multiple businesses and individuals, with all that mail into your brain at the same time can be tiring.

5. IE Tab


Tipsters tips from Lifehacker. It is basically the same as the first method, you still use two different browsers, only this time you're open IE in Firefox via an extension called IE Tab. This solves the problem of having multiple windows open, but it only allows you to log on to two different Gmail accounts at the same time, not more. Moreover, it uses the IE Tab extension for other purposes before, I've found it unstable. Finally, Firefox purists probably can not stand to have IE polluting their Firefox, but not a real downside, but I added it because I'm sure someone out there will hate the idea.
=>>how-to-change-your-gmail-password

Thứ Ba, 26 tháng 4, 2016

How to change your Gmail password

To ensure your Gmail account more secure, you should change your passwords every 2-3 months. To change your password please refer to the following guidelines:

Note: When you change your Gmail password means that you also change the password for your Google account, such as YouTube, GoogleMaps, Google Plus .. and you should turn off capslock when you enter a password.
You need to select a password as long as possible with both lowercase and uppercase letters numbers
After logging in you click the button below: Change your password


And you enter the required information where google
Note: you must enter a new password at least 8 characters. You should combine the characters and numbers and signs of capital ... to password security. You should not use simple passwords like: 12345678, name, birth date, your phone number ...
Then you click "Change password".
After changing the password Gmail is successful, you will be cameback account settings page.
The next time you access Gmail, remember to use the new password! Success!

Note: If you forget your password, you can press the "Restore your Gmail password."
=>>How to Create a Backup of Your Gmail

Thứ Hai, 25 tháng 4, 2016

How to Create a Backup of Your Gmail

Gmail is known as one of your partners in the email and personal email services. Today, important documents, reports, messages will be sent via email interaction keeps people together quickly and conveniently. However, the document is stored on your Gmail tend to be wiped out, but you can not see them again. Many have lost their important messages, you want to avoid situations like this? Here we will guide you how to back up your Gmail account in a most simple and you just need to do exactly according to the following steps:


* When you are using the setup mail in Gmail:
First, you open the browser and log in to your Gmail account, you will be redirected to another page click Mail Settings you> click "Forwarding and POP / IMAP". You will be offered a number of options you click on
 "Enable POP for all mail" and finally click: Save Changes
* When using Apple Mail:
Click Mail Preferences then click the Accounts tab.
Add a new account by clicking on the "+" button below
A dialog box appears, enter your name, e-mail addresses of your clicks
Or you can click on the box next to "Automatically set up account" and click create account.
* When using google takeout:
You open your browser and go to https://www.google.com/settings/takeout type => Select the downloaded data and click Next. Next select your files and waiting for your email. You will receive an email with the date backup
* When using a Gmail backup downloaded:
You install software and Dowload https://code.google.com/p/gmail-backup-com/ page down
Then, open the command prompt or terminal and your o of the program folder. Load and replace d program, "dir" to name the folder you want to use your email address with your own password.
* When using Windows Mail:
Go to the Tools menu and click Accounts, and click Add, select the email account and click Next.
In the From field of the message sent, enter your name and click next.
Enter your full Gmail address and fill out all required information is as follows:
Incoming mail server type: POP3
Incoming mail (POP3 or IMAP) server: pop.gmail.com. Google Apps users, enter the server name provided, not your domain name.
server (SMTP) Outgoing e-mail Name: smtp.gmail.com
outgoing server requires authentication: enabled
Then, click Next and enter your Gmail address and password, then click Next. Check the box next to "Do not download my e-mail at this time, then click Finish
=>> Auto format conversion feature for Office attachments in Gmail

Auto format conversion feature for Office attachments in Gmail

Recently, Google has added features auto convert attachments in Gmail. You click Edit in it will appear on attachments, Google Docs, Sheets, or slide will run, it will convert and open one file ready for you to edit.


Then when you're done editing you just crack up and the document will automatically be saved to your Google Drive. Google has added 15 new Office format drives, including the presentation file is just to run PPS, PPSX, embedded text macros, embedded files, sample files are all supported in a better way all picture diagram and tables
If you want to edit Office files directly without having to convert the form of Google ddihnj floor, followed then you can install this extension for Chrome browser
=>>Gmail Sign up

Thứ Sáu, 22 tháng 4, 2016

Gmail Sign up


Free system with email hosting, Google email has quickly become popular and are used extensively worldwide. Article will let you know why we need to have a Gmail account and one creating a Gmail account.

Like other products of Google, Gmail is very unique, fast and efficient. Also, Gmail provides protection rose in junk e-mail is great but very important in e-mail environments. Gmail gives confidence, security everything. Most of Gmail email functions are free. So how do you have a Gmail account. Here are instructions for creating a simple and fast Gmail.

Step 1: You must visit www.google.com. it is the main home page to start all activities of Google. You click the "Gmail" upper corner of the page. After clicking a new window opens that allows you to log into gmail or create a new account.
When you select a new Google account, you will be asked to set up personal information. You must select the exact name and email address you want to create for your account before the tail @ gmail.com. You must make sure that the name you choose must be unique or the user does not have to use it. If you are notified that an account or user name is not available, google will give you a small hint on and give you the option selected until accurate.

If you own more than one account with Gmail and want to check on both at the same time then it may well. Although it seems a bit difficult, but here's what you can do when you want to get into all the trading accounts by side in the same internet browser.
• Sign in to your Gmail account.
• Click on your ID is located at the top.
• Click the option Include account, you can get to different tabs that will allow you to make sure gmail login to your other accounts affiliated with Google.
Also, if you work with Chrome as your primary internet browser to use this function; then it will save your time

How to setup a Gmail auto reply message

Thứ Tư, 20 tháng 4, 2016

How to setup a Gmail auto reply message

Redirect your Gmail messages from your old account to your new account

You often busier with work and everyday life, but do not have time to check your email, as well as customer service tinh.Vay difficult so you need to create an automated mailbox 1 simply hon.Tao a content Gmail autoresponder will do for customers as well as others feel satisfied with your service and your care.

The following guide to help you create an automated messaging gmail
 you login gmail account and perform the following steps
First, click the gear icon place red arrow pointing at the picture below


you will see a small window as shown and click on Settings:
Installation interface appears, including the main function

You pull down and to the "Vacation responder"

ADM item you reply to a message, and follow the red arrow, click the mouse cursor on 'Vacation responder on', then select the first day and last day you apply this feature. (Red arrows Monday)

In the following lines, you can type in the subject can be a reason not to check the mail, asking them to send mail to you. In the message box, you can leave a message that can be in any form, such as contacts, advertising, or any reason you need to confess.

Follow the red arrows Tuesday, you can check this square if you want everyone in your contacts to receive automatic messages to your reply. Otherwise, all incoming messages can also receive messages Your autoresponder.

When you're done, click Save changes to complete the above settings.